
The Financials system lets you create and process manual invoices. Creating a manual invoice has parallels with creating an invoice from a purchase order. This section explains how to enter manual invoices.
You can create manual invoices only from Accounts Payable. Two methods exist:
Many sites require approval of invoices. You can set up approvers in ERP and design the approval flow for your invoices as suits your operations. Details are in the topic Invoice Approval Processing. Also, in the Process Flows section of the online help The Approval Process for Invoices, Check Requests, Requisitions, and Vendors: Setup and Flow may be useful.
To access organization, department, or asset location data, the organization, department, or asset location must be included in your data profile.
Your assigned role's "Invoicing" security object must be set to Create (minimally) for you to create manual invoices.
The first panel for entering invoice information is the Create Invoice panel (Figure 1).
Fields containing an asterisk (*) are required.
Be sure to check fields on both tabs -- Invoice and Approval -- for fields that you may need to complete.
Below are details for invoice fields.
Invoice tab: Organization |
The Organization specified in your Current Setting appears in the field. Click the prompt to select a different organization. You can select any organization in the list. (The list shows all organizations defined in your user profile.) |
| Vendor Number | Click the prompt to select the vendor number for the invoice's vendor. |
| Invoicing Location | The system populates this field with the Vendor AP Location. You can select a different AP Location, if needed. |
| Invoice Number. | Enter the invoice number from the copy of the invoice. The Invoice Number can have a maximum of 30 characters. |
| Invoice Date | Enter the date from the invoice. |
| Invoice Received Date | If your organization tracks invoice received dates, enter the date when the invoice arrived for processing. |
| Invoice Total |
Enter the total dollar amount of the invoice. If you also work with purchase order invoices, notice that a manual invoice has no Taxable Amount field. |
| PO Number | A purchase order number associated with the invoice, if any. |
| Period | The period on the invoice. When you create an invoice group, the period and year that you enter are the defaults for all the invoices in the group, regardless of how any invoice was created (e.g., manually, with a PO, etc.). Invoices created in another period cannot be added to the group. |
| Year | The year. Normally, defaults to the current year. If the invoice is created as part of an invoice group, however, the period and year for the invoice group are the defaults for all the invoices in the group, regardless of how any invoice was created (e.g., manually, with a PO, etc.). (Invoices created in another year cannot be added to the invoice group.) |
| Description | A description of the invoice. |
| Distribution Profile |
A Distribution Profile contains pre-built charge lines for charges such as freight, postage, etc. If the vendor has an associated Distribution Profile, the system populates this field. You can also select a profile from the prompt. The AP tables contain your site's Distribution Profiles, if any have been set up. See Set Up Charge Types and Distribution Profiles for details. |
| Default 1099 Code | The relevant 1099 code, if any. |
| Default Project Code | The identifier of the default project, if any, associated with the invoice. The default Project Code is the Project Code specified on the Vendor record (if any). |
| Default Fund Code | The identifier of the default fund, if any, associated with the invoice. The default Fund Code is the Fund Code specified on the Vendor record (if any). |
| Invoice Group ID | An identifier for the invoice group. If you select an invoice group, the system verifies that the organization has the invoice group. If not, an error message appears when you click Submit. In that case, change either the organization code or the invoice group identifier. |
| Payment Terms | Initially set to the vendor AP location's default values, but you can select new payment terms from the prompt. |
| Invoice Due Date | The date when payment is due, as stated on the invoice. |
|
Discount Terms |
Initially set to the vendor AP location's default values, but you can select new discount terms. You can also select the tabs: Invoice > Discount to specify new discount schedules. The system allows up to three discount schedules. |
| Discount Date | The date through which a discount can be taken on the invoice. |
| Tax Type |
Notice that the invoice in Figure 1 has a Tax Type of
"Sales taxable." Initially, the system shows the Tax Type as specified in the organization record. When you select a Vendor /AP Location using the prompt, the system populates the tax fields based on both the organization and vendor / AP Location records. If you key in the Vendor and AP Location manually, and the AP location is sales or use-taxable, the Tax Type and Tax Group fields default to the AP location's tax settings. On manual invoice with a default of Sales Taxable or Use Taxable, if the system finds no default Tax Type or Tax Group, the Tax Type /Tax Group fields are not completed. Before you can process tax charges, AP must be enabled for taxes. See Setting Up Tax Information for Accounts Payable. |
|
Tax Group (Also see Tax Type) |
A Tax Group contains a group of related taxes, tax expense and liability accounts for each tax in the group, and a distribution method. If the invoice is taxable, and you have enabled tax processing for AP, the system calculates the tax for each goods line using the Tax Group settings. Taxes can be distributed two ways: Pro-rated - The total tax amount is distributed among accounts for the goods lines. The amount distributed is proportional to each goods line's percentage of the total amount. Single GL Account - The total tax amount is posted to a single account. |
Inter-Org Distribution Allowed |
When checked, an invoice can be distributed among different organizations in a multi-organization environment. |
Payment Method |
Specifies the payment method to be used. The payment method is inherited from the Vendor AP Location record. The Payment Method can be overridden when a payment is created.
The payment completion process automatically clears invoice payments whose payment method is Credit Card or any of the ACH types. |
Approval tab:Direct Approver |
A single individual responsible for approving invoices. Click the prompt to select the approver for the invoice. |
| Approver Group | A group of users who approve invoices. The group has been set up in the system. Invoices are routed within the group based on the amount of each invoice, and each group member's approval dollar limit. In the routing process, an invoice's Total is compared to each approver's Maximum Approval Limit to determine if the approver needs to review the invoice. Each member of an approver group can approve or reject invoices up to his/her dollar limit. Note: Your organization may require that you enter either a Direct Approver or Approver Group for manual invoices. If required, and you fail to enter either a direct approver or approver group, Accounts Payable displays an error message. |
| Approval Needed By Date | The date by which approval of the invoice is needed. |
| Approval Notify Action | For users who create invoices, this field specifies how the user should be notified when an invoice has been approved or rejected by the person or approver group responsible for approvals. If the user does not wish to be notified, the setting is No Notification. Your User Profile has the default setting for notification. This field overrides the default. If you wish to change your default Notify Action, select an action from the prompt (...). The choices are: No Notification (default) email on Approve email on Reject email Approve or Reject. The email options send the user email to the address specified in the email Address field (on the General tab). |
| Distribution Review Direct Approver | The approver with the authority to balance and approve unbalanced distribution lines on a manual invoice that has been reviewed and approved by a distribution review approver group. This person cannot be the same as the Direct Approver. |
| Distribution Review Approver Group | Users designated to review distribution lines on a manually created invoice. If an individual distribution review approver group member balances and approves the distribution lines on the invoice, it will bypass the distribution review direct approver. |
| Exception Clearing Notify Action | For users who create invoices, the user profile field Invoice Exception Clearing Notify Action specifies (by default) how the user should be notified when an invoice exception has been cleared. |
Figure 2 is a manual invoice header with several fields completed. Notice that the Payment Terms and the Discount Terms are initially set to the vendor's AP location defaults (red arrows). You can change the Payment Terms and Discount Terms by selecting new values from the prompt.


The next task is to create lines on the Distribution Lines panel. The invoice in Figure 3 (with a total amount of $390.86) will have three lines for items, and a charge line.


You can enter statistical GL account information on an invoice from the Distribution tab, just as you enter financial accounts for goods or charges. Statistical accounts can also be entered on Check Request detail lines. (See the Check Request topic.) Invoices with statistical account distribution lines can be imported. (See Import Invoices into Financials.)
Statistical recurring invoice distribution details are not currently supported.

When you select a statistical account for a distribution line, the application sets the Line Type to Statistical. The application will not let you change the Line Type when the GL Account field contains a statistical account. If you key in statistical account segments manually, you will need to set the Line Type to Statistical manually.
Restrictions for Statistical Account Lines: An invoice cannot contain only statistical account lines. It must also contain lines for financial accounts.
Amounts for statistical account lines are not added to other distributed totals for an invoice. When you balance an invoice with lines for statistical accounts, the value(s) that you entered in the Amount fields for each statistical distribution line are accumulated in the Statistical Amount field on the invoice header (Figure 7).

Accrued Receipts
Accrued Receipts Summary
Accrued Receipts Summary2
AP Reconciliation Report
AP Reconciliation Report - All Periods
AP Reconciliation Report - Summary
Payment Expense Accounts.
GL Export Report
GL Export Summary Report
GL Transactions MM and AP.
Invoice Activity
Invoice Activity Summary
Invoice Match Header.
A distribution profile may be associated with the invoice vendor. If so, the system automatically creates distribution lines as specified in the distribution profile. Also, if your organization has a General Ledger account specified for Freight and/or Other (in the Organization record), the system will pre-build distribution lines for those categories on the invoice. (If you don't use the lines, they are automatically deleted when you click Finish Now.) Otherwise, if the invoice has no appropriate pre-built lines for charges (as in Figure 1), you need to create the lines yourself.
To build a charge line, enter charge line information on the Distribution tab in the same way that you entered goods lines:

Each charge type assigns charges to general ledger accounts according to a specified Distribution Method. The distribution methods are:
Pro-rate - Allocates charges to each goods line's account in proportion to the total goods amount. On the invoice, you do not need to enter a GL account for the charges since they will be spread among goods accounts when the invoice is approved.
Spread Evenly - Allocates an equal amount of the charges to each goods line when the invoice is approved.
Single GL Account - Allocates the total charge amount to one GL account. Instructions for identifying the account are below.
Manually - You must select the GL account for the charge on the invoice.
Figure 9 shows the invoice with a freight charge of $16.36 entered as a freight charge with Charge Type "Freight on Board." Because the distribution method for the Charge Type is "Pro-rate," $16.36 will be distributed among the goods lines in proportion to each line's contribution to the total amount. The distribution of the charges occurs when the invoice is approved. (You will not see charges added to goods lines amounts as you are entering charges.)

When your invoice is balanced, the Difference field (top right) is zero. You can complete the invoice by clicking Finish Now, or click Finish Later to come back to the invoice another time.
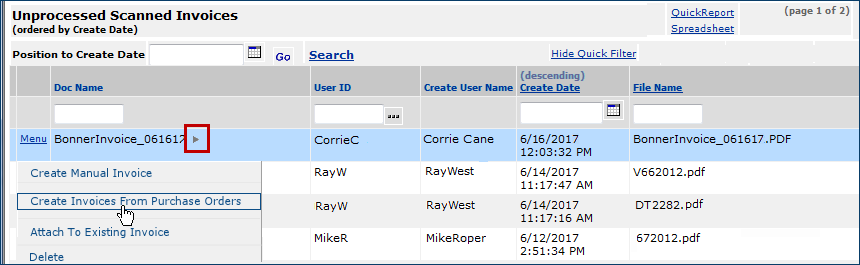
When you receive a paper copy of an invoice, you can scan it into your network and have it sent directly to Accounts payable. Scanned invoices are delivered to the system via Pulse. Once in the system, the scanned file can be used to create an invoice. When you create an invoice, you can attach the scanned file as a document.
Each user who works with invoices needs a network folder -- an "inbox" -- for scanned invoices that are picked up by Pulse and uploaded to Accounts Payable. Panels in Accounts Payable provide access to scanned invoices for each user of this feature. Panel menus provide actions such as creating a new purchase order invoice or manual invoice. Scanned invoices used to create an invoice can be attached to the Invoice Documents panel.
Several steps are involved in configuration of this feature. Pulse uses the file type Scanned Imports which must be enabled. Also, you may wish to make the feature available only for particular organizations and users. Your scanner must also be capable of outputting scans in Adobe Acrobat .pdf format.
Important: Call the Help Desk for assistance with setup.
Creating a manual invoice follows the usual steps. See the previous discussion "Entering Information on Invoice Panels." Below is a summary.

The scanned invoice disappears from the Unprocessed Scanned Invoices panel and moves to the Processed Scanned Invoice panel (Accounts Payable > Invoices > Processed Scanned Invoices).

With Financials: Accounts Payable, you can copy a manual invoice.
Once an invoice is completed and approved, you can review it to see how the system distributed amounts for goods, charges, and tax to accounts.

In Figure 12, the red box contains the goods lines from the invoice. The blue box displays the charges. Since the distribution method for the Charge Type is "pro-rate," the charge lines are distributed among the goods lines, and posted to the goods account (001-000-00-0008). (The account happens to be the same for each goods line, but the accounts could differ.)
The items on the invoice are taxable. The Tax Group for the invoice is 7% Tax. (Figure 3). This tax group contains two tax rates: "NC STATE 5.000%" and "NC FOOD 2.000%." Both tax rates are applied to each goods line, and the tax amount is written to the goods accounts, in this case: 001-000-00-0008. You can view the tax lines under the charge lines in Figure 12.
Check requests are user-initiated requests for invoice payment. These requests contain information that populates a manual invoice within Accounts Payable. Invoice Number, Invoice Date, Invoice Total, Vendor, and Pay To data can be entered on a check request, as well as check total and distribution detail amounts. When information on the check request is complete, and the check request is balanced and approved, AP staff can create an invoice from the check request and submit it for payment.
An approval workflow allows each check request to be reviewed by a single “direct” approver or routed to several approvers in an approver group. Every department that uses check request processing can identify a direct approver or approver group on its department record.
Several setup steps are necessary if you wish to use check requests. Also, check request users must have the appropriate security settings in the check request role objects. Check request data is also governed by users' data profiles.
If the Check Request feature is enabled for your site, and you have the appropriate permissions:
Check requests are explained in detail in the online documentation topic "Check Request Processing."
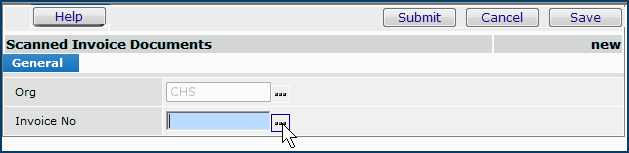
Documents can be attached to invoices. The documents can be viewed, added, or deleted when editing or inquiring on an invoice.
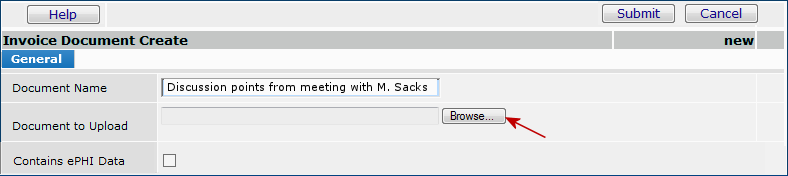
Documents Containing Electronic Protected Health Information (ePHI)
If you do not have ePHI access, and the "Contains ePHI Data" checkbox is selected, you cannot view a document. When you click the arrow to open the document, the Insufficient Authority message appears. For more information, see Securing Electronic Protected Health Information (ePHI).
For Bill Only documents, if the checkbox has previously been selected for "Contains ePHI Data," then only the Administrator can change the status of the document and select or unselect the "Contains ePHI Data," checkbox. This checkbox remains locked for everyone else.

Copyright © 2023 by Premier Inc. All rights reserved.