
This topic outlines how to set up and use the invoice approval process. Buyers and anyone who creates or approves invoices should find parts of the discussion useful. The information also will be of interest to system administrators. This feature is available for Supply Chain and Financials.
The invoice approvals process enables designated approvers to review and approve or reject invoices created in the system. Any purchase order invoice, manually-created invoice, or recurring invoice can be put into the approval process. Approval routing is also supported for EDI 810 invoices for blanket, standing, bill-only, and regular purchase orders.
You can require approval for an invoice by settings as follows:
The invoice approvals process, similar to requisition approval, allows invoices to be reviewed by a single “direct” approver or routed to several approvers in an invoice approver group. Invoices are routed within the group based on the amount of each invoice, and each group member's approval dollar limit. In the routing process, an invoice’s Total is compared to each approver's Maximum Approval Limit to determine whether the approver needs to review the invoice. Each member of an approver group can approve or reject invoices up to his/her dollar limit. (Two users in the same group cannot have the same dollar limit, however.)
Each approver has an approval queue that contains invoices awaiting approval. An approver can select an invoice from the queue for review and approve or reject the invoice, or do neither. The system can send a notification to an approver when an invoice is placed on the person's queue. Notifications can also be sent to the creator of the invoice when the invoice is approved or rejected.
You can attach documents and emails to an invoice using Microsoft Outlook. You can create emails while editing or viewing an invoice and view existing documents attached to the invoice.
While invoices are pending approval, the existing unapproved invoice accrual process automatically generates the auto-reversing GL Accrual transactions.
In the Process Flows section of the online help The Approval Process for Invoices, Check Requests, Requisitions, and Vendors: Setup and Flow may be useful.
Invoices in Invoice Groups can take advantage of the approvals process. The status of an Invoice Group is "Approved" only when all invoices in the Invoice Group are approved.
Role Objects control access to approver group edits and invoice approval queues. You may need to change the settings of role objects for users who work with and administer invoice approvals.
The documentation topic Set Up and Maintain Users, Administration, and Security explains role objects in more detail.
The role objects for invoice approval routing are:
| Role Object | Allows Users To: |
| InvApproval | Maintain Approver Groups and members. View, approve, and reject invoices. |
| Inv Approval Admin | Access to the All Invoice Approval Queues. This contains invoices awaiting approval for all users. |
Distribution Approvals: To edit an invoice distribution line, the "Invoicing" role object must be set to Create.
See Set Up Buyers, Approvers, and Approver Groups for security details.
Setup for invoice approvals processing involves the following:
Users who approve invoices (including members of approver groups) must have the authorization User is Invoice Approver selected on the Roles tab of their user profile.
Notes:
You can also set an approver buddy for a user by clicking the down arrow next to Invoice Approver Buddy and making a selection (Figure 2).
Details for setting up different kinds of approvers is in the topic Set up buyers, approvers, and approval groups. The discussion of invoice approvers (in this section) is repeated from that document.
Assigning each direct invoice approver a dollar limit for invoices lets you better control approval processing. This enhancement also makes it easier to allow some approvers only authority for small dollar invoices.
The dollar limit setting also applies to approvals of invoice credits.

![]() Users who approve invoices have the option to be notified when an invoice has been added to their Invoice Approval Queue.
Users who approve invoices have the option to be notified when an invoice has been added to their Invoice Approval Queue.
To set an approver's notification options, approver buddy, and other options, open the person's user profile as follows:

When a direct approver wishes to designate an Invoice Approver Buddy, only users with an equal or greater dollar limit than the Direct Approver are available for selection from the drop list. This restriction ensures that a direct approver's approver buddies are authorized to approve invoice the appropriate dollar amounts when the Direct Approver is unavailable.
When a direct approver's Dollar Limit is edited to change to a lower value, and he/she is assigned as a Invoice Approver Buddy to other approvers, the system displays an error message and lists all of the approvers' names to which he/she is assigned as a approver buddy. The error message explains that the Dollar Limit change is invalid because the user is an Approver Buddy for other direct approvers who have higher dollar limits.
Users who create invoices have the option of being notified when an invoice has been approved or rejected by an invoice approver.

If you select eMail Approve Or Reject, and your email address is entered in your User Profile, when a notification arrives that you have an invoice to approve, a link within the email notification takes you directly to the transaction needing approval, and avoids your having to navigate manually through ERP after receiving an email message. You can select Approve Invoice or Reject Invoice from the email message. See the discussion below.
Note: The link from an email is only available for Microsoft Internet Explorer. Mobile browsers, Firefox, Chrome, and others are not supported. Of course, you can also access an invoice that needs approval through your approval queue.
Invoice Approver Groups allow invoices to be routed to multiple approvers. In the routing process, an invoice’s Total is compared to each Approvers Maximum Approval Limit to determine whether the approver needs to review the invoice.


The Invoice Approver Group Edit panel appears (Figure 7). When you add users to the group, they are listed on this panel.


By restricting approver groups by organization, you can limit user access to them based on users' Data Profiles.
When an approver group has been restricted by organization, it will only appear in lists where the user has Data Profile access to at least one of the restricted organizations.
The Invoice Approver Group Edit panel (Figure 9) displays a tab -- Restricted Orgs -- that allows you to restrict the approver group by organization.
When an approver group is restricted by organization, Yes appears in the Restricted column on the Invoice Approver Groups List.
![]() Reason Codes provide a shorthand method for communicating the reason for approval or rejection. They are required when an invoice approver approves or rejects an invoice. The approver selects a Reason Code from a list that you or your system administrator creates.
Reason Codes provide a shorthand method for communicating the reason for approval or rejection. They are required when an invoice approver approves or rejects an invoice. The approver selects a Reason Code from a list that you or your system administrator creates.
Vendor Approvals are an optional way to allow the invoice approval settings on an invoice to default automatically based on the invoice vendor. For any vendor, define either the Direct Approver or Invoice Approver Group for each organization. When an invoice is created for the vendor and organization, the system automatically uses the approval routing set up for the vendor.
Note: Set up Approver Groups first. You will want to assign an Approver Group to a vendor.

If the direct approver has been pre-assigned to a vendor, and the approver's limit is not high enough to approve an invoice, you receive a message, for example:
Direct Approver "name" Invoice Direct Approval Limit is insufficient for this invoice. Please assign another approver.
The person creating the invoice cannot go further until a valid approver is designated.
Edit the invoice and click the Invoice Direct Approver prompt to select a new approver. The select list only displays users with a dollar limit high enough to approve the invoice. Also, direct approvers on the list have the appropriate Data Profile settings for the organization, department, and asset location (if relevant) on the invoice.
In the invoice below, the Direct Approver assigned to the vendor has a dollar limit of $3,000.00. The invoice amount is $6,000.00 (Figure 11).The user creating the invoice has entered header information, and clicked Save. The application displays an error, and a message below the invoice header that explains that the approver does not have a high enough dollar limit to approve/reject the invoice. In this situation, you must select another approver from the Direct Approver prompt (Figure 12).


The selection panel displays approvers with dollar limits appropriate for the invoice amount (Figure 13). The dollar amount is on the panel header.

An approver's maximum dollar limit can be changed simultaneously for all approver groups that the user belongs to.
You can make mass changes from the Materials Management Requisitioning menu, or the Invoicing menu; or from the Accounts Payable Invoicing menu. The mass change feature is similar to other utilities in the system for making mass changes: first, you build the changes that you wish to make; then, you instruct the system to execute the changes.
For detailed instructions on how to change approver limits, see the discussion of mass changes to approvers in the approver setup topic.
You can set up manually created invoices for review of their distribution lines.
On the Organization Edit panel, click the AP Information tab to select Distribution Review for Manually Created Invoice.
The organization record specifies whether approval of manual invoices is required. The Organization edit panel AP Info tab contains the field: Dist Review Enabled for Manually Created Invoices (Figure 14, red).
The Dist Review Enabled for Manually Created Invoices optionally allows invoice distribution to be reviewed and approved. If you want your invoices to require approvals, then check the box Approval Required for Manually Created Invoices (Figure 14, green) as well.
Note: This field was previously called: Distribution Review for Manually Created Invoices

For organizations with the flag checked, two fields for manual invoices allow the selection of either a direct approver or approver group for distribution review (see Figure 15 below). These fields are available on the Approval tab when you create an invoice.
Invoices that are out-of-balance (or otherwise incomplete) can thus be updated and approved or rejected by a distribution review approver or approver group.

The approver group may include a Final AP Distribution Direct Approver (AP > Invoicing > Invoice Approver Groups > New). This field is visible on the New Invoice Approver Group panel (Figure 16) for all organizations, because an approver group is not unique to an organization.
- If a Final AP Distribution Direct Approver is designated, out-of-balance invoices can be approved by all reviewers and
then routed to the Final AP Distribution Direct Approver, who must balance the invoice.
- If the invoice is balanced before it reaches the end of the distribution review group, it will not be routed to the Final AP Distribution Direct Approver.

Note: When a manual invoice eligible for distribution review is approved, the period and year are set to the current period and year.
You can set up manual invoice distribution reviews and check request reviews so that approvers can only see GL accounts that are valid, based on the users' Data Profiles, and relevant for distribution/check request review, allowing invoices to be properly categorized.
This feature does the following:

Materials Management or AP main Contents > Tables > Organizations > locate Organization > edit > GL Info tab
Note: If you set the Distribution Review/Check Request Account field for an organization, you must also specify the accounts that are distribution review accounts and vice versa.

When the Distribution Review / Check Request Account field on the Organization record is checked and the appropriate accounts are designated as Distribution Review/ Check Request accounts, this feature works as follows:
Invoice distribution reviewers or check request reviewers: Clicking the GL Account prompt on the invoice or check request Distribution panel (Figure 19) displays only accounts that are valid for the organization(s) and department(s) in your Data Profile and that are designated as Distribution Review/Check Request Account.

Accounts Payable main Contents > Check Requests > My Check Requests > locate check request > edit
If you click the GL Account prompt to enter a distribution review account and your organization and/or department is invalid for the invoice or check request, the list of accounts will be blank. Similarly, if you key in an account number that is not designated as a Distribution Review/Check Request Account, an error message also appears.
Note: The Search for the GL accounts list contains a new option for finding distribution review accounts. The list of accounts contains the new quick filter Distribution Review/Check Request Account (Figure 20). The quick filter is only visible when the Distribution Review/Check Request Account field is set for the organization.

General Ledger main Contents > Account Management > GL Accounts >
Account mass maintenance users: For account mass maintenance, the new Distribution Review/Check Request Account field is also located on the Select Fields panel and available for sorting the accounts list. On the mass maintenance import, the field defaults to "blank" -- the flag is not set. When a new account is created, by default, the Distribution Review/Check Request Account field is not set.
When you create an invoice, the Approval tab contains fields where you identify the person or Approver Group responsible for approving the invoice.


Your organization may require that you enter either a Direct Approver or Approver Group for manual invoices. If required, and you fail to enter either a direct approver or approver group, Accounts Payable displays an error message.
Your organization may also require distribution reviews.
The Distribution Review Direct Approver has the authority to review, balance, and approve the distribution lines prior to approval.
When your organization requires approval for manually created invoices and distribution reviews, entering either a Distribution Review Direct Approver or Distribution Review Approver Group will satisfy the approval requirement.
- If you do select both a Distribution Review Direct Approver and the Direct Approver, and you select the same person for both, the system ignores the Direct Approver, and blanks out that field.
- If you select the same group as the Invoice Approver Group and the Distribution Review Approver Group, the system ignores the Invoice Approver Group selected, and that field is blank.
Many sites use auto-approval routing for EDI 810 invoices from specific vendors. Others need the ability to route EDI 810s for approval independently of who the vendor is. For auto approvals, you can assign invoice approvers on a vendor panel to route invoices for that vendor to those approvers (Materials Management main Contents > Vendors > Vendor Approvals for Invoices).
If you do not use auto-approval routing by vendor, you can assign approvers for EDI 810 regular, standing, bill-only, and blanket invoices as follows:
- From the purchase order. The assigned approver/approver group propagates to the EDI 810 invoice and back-copies to the associated requisition.
- From the requisition. The assigned approver/approver group propagates to the associated blanket purchase order and EDI 810 invoice.
- On the EDI 810 invoice (if not assigned on either the PO or the blanket requisition). See Figure 23. The ERP application then back-copies the approver/approver group to the PO and the requisition.
The invoice then routes to the designated approvers.

For blanket invoices (only), a field on the Organization record lets you "turn off" automatic approval routing (if you have that feature set up on the vendor), and at the same time, require invoice approvals for EDI 810 blanket POs.
With automatic routing by vendor turned off, you can assign approvers to EDI 810 blanket invoices as follows:
- From the blanket purchase order. The assigned approver/approver group propagates to the associated blanket requisition and EDI 810 invoice.
- From the blanket requisition. The assigned approver/approver group propagates to the associated blanket purchase order and EDI 810 invoice.
- On the EDI 810 invoice (if not assigned on either the PO or the blanket requisition). The ERP application then back-copies the approver/approver group to the PO and the requisition.
See "Setting the Approval Fields on the Organization Record for EDI 810 Blanket Invoices" for details.
The field is: Invoice Approver for Blanket Req/PO required (Figure 24).
![]()
Unselected: The default setting is unselected. When the field is unselected, ERP uses any approver/approver group set up on the vendor record for automatic approval routing.
Selected: When you select the field, any approver assignments set up on the vendor panel are ignored, and you must create approver assignments on the invoice (PO, or requisition).
Approver assignments propagate from the requisition to the PO to the respective EDI invoice.
How ERP generates POs from requisitions
When a requisition is released, ERP first looks for an existing, unedited PO with the same vendor and buy-from location.
If an open, unedited PO exists,
- ERP adds item lines from the requisition to an the existing PO.
- Identical items are combined on PO lines. If a PO line for a requisition item is not on the existing PO, then a new line is added.
- For blanket POs, the Dollar Limit on the PO is increased by the Dollar Limit amount on the blanket requisition being added.
Also, the Expiration Dates are compared. If the new blanket requisition has an Expiration Date later than the existing PO's Expiration Date, the existing PO's Expiration Date is changed to the requisition's Expiration Date.
If no usable PO exists for the vendor buy-from location, a new PO is generated for the requisition.
The correct invoice approvers also need to be included on generated POs
ERP also needs to match the correct requisition/PO with the incoming EDI vendor invoice, and the correct invoice approvers. Since you can assign invoice approvers on requisitions, when multiple requisitions (for the same vendor) contain different invoice approvers, ERP accounts for the invoice approver assignments in generating POs.
- For example, if an open PO already exists for the same vendor with the same invoice approvers, ERP will add the requisition lines to it.
- If no open PO exists for the vendor with the same approvers, then a new PO is created.
Several tools let you monitor the progress of an invoice through approvals.
You should have the notification fields in your user profile set to receive messages about the approval status of your invoices.
- The Invoice Status column displays one of these values for approvals purposes:
Pending Approval - the invoice has been submitted for approval and is being reviewed.
Rejected - the invoice was submitted for approval and rejected by an Invoice Approver.
Note: If the last approver in an Approver Group approves an invoice, the invoice can still end up with the Status of Rejected. This situation occurs if the invoice Total exceeds the last approver's Dollar Limit. The clue to this occurrence is in the Invoice Approval History: the audit shows that the last approver approved the invoice, but the invoice Status changed from Pending Approval to Rejected.
Approved - the invoice was submitted for approval, and was approved.
- The Approver Reviewing column displays the name of the person reviewing the invoice.
The reviewer may be a Direct Approver, or a member of an Approver Group to whom the invoice is currently routed.
The Search on the Invoices List panel contains filters -- Pending Approval and Rejected -- that let you sort the list by approval status.
Direct Approvers are solely responsible for the approval or rejection of a submitted invoice. When they approve an invoice, the invoice Status is Approved.
Approver Groups share responsibility for the approval or rejection of a submitted invoice. When a member of an Approver Group approves an invoice, the invoice Status remains at Pending Approval until all eligible approvers in the group have reviewed the invoice. When the last eligible approver approves the invoice, the invoice Status is set to Approved.
Invoices are routed sequentially to each invoice approver in an Approver Group -- according to each approver's Maximum Approval Limit -- until the approver whose dollar limit is greater than the Invoice Total is reached.
When an approver user sets his/her "Out of Office" status, approvals for the user are routed to the users Approver Buddy.
Approvers access invoices waiting for approval through approval queues.
- My Invoice Approval Queue is unique for each approver and shows invoices assigned to the approver.
If you are an invoice approver, this queue contains invoices assigned to you.
-
All Invoice Approval Queues shows invoices assigned to all invoice approvers.
- Consolidated Approval Queue shows invoices awaiting approval, and any other transactions documents (such as requisitions) that you are also authorized to approve.
Based on an invoice approver's user profile settings, the approver may be notified by an email when a new invoice is placed in his/her approval queue.
If you are set up to receive email notifications when an invoice is ready for review, you can link directly to the invoice from the email. (See the Notifications Setup section above.) You can also access invoices for review/approval from your approval queue.
The Accounts Payable (and the Materials Management) main Contents contains menu links to the approval queues.


- Click Submit to open the Approve/Reject panel (Figure 27) from which you can approve or reject the invoice.

- Select Approve Now or Reject Now.
- Select a Reason Code.- If you select Reject Now, you must enter Rejection Comments.
Rejection comments can provide the invoice originator useful information. For example, if you are not the appropriate approver, you can enter the name of the correct approver in the Rejection Comments field. (You can also add a Reason to the Reason Codes table that indicates "incorrect approver," so that reviewers can select that Reason Code.)
The system creates a User Note containing the rejection comment's text.
- Click Submit.
Notes:
-
When the Invoice Status is Pending Approval, the Finish Now button is disabled. A user who edits the invoice cannot click Finish Now to process the invoice. The invoice must first be approved.
- An invoice on the approval queue cannot be approved when it is out-of-balance. This rule applies to both manual and PO invoices.
- When invoice distribution details are added or changed on an invoice that is Pending Approval, the invoice Status does not change: it remains as Pending Approval until rejected, or approved.
The Rejection Comments field is particularly handy in the situation where an invoice has been routed to an inappropriate reviewer. The rejecting reviewer can use the Rejection Comments to list the name of the correct reviewer, if known, so that the invoice can be rerouted (Figure 28).

Sites where this approach is useful may also wish to create a Reason Code that indicates an incorrect approver. Figure 29 is an example.

To create a rejection reason code, from the Materials Management or AP main Contents, select Reason Codes > Reason for Approval/Rejection. Click New.
The Consolidated Approval Queue consolidates all your invoices, journal vouchers, check requests, and requisitions needing approval in one place.
You can see all the transaction documents that you are authorized to review and approve or reject.
This panel is helpful for approvers who approve multiple types of transaction documents...such as invoices and requisitions...so that they do not have to go multiple approval queues in the ERP application. Everything is in one queue.
From the Materials Management, Accounts Payable, or General Ledger main contents, select Consolidated Approval Queue (Figure 30).

The list of transaction documents awaiting your approval appears. On the list are invoices awaiting approval, but also any other documents that you are authorized to approve.
The links and menu have the same capabilities as those on My Approval Queue or on All Approval Queues.
When an approver's Out of Office status is set, invoices for the approver go to his/her Approver Buddy. If an approver group is assigned to the invoice, both the original approver and the person's Approver Buddy can belong to the approver group.
In this situation:
Recurring invoices must be processed as "unapproved" to take advantage of approval routing (Figure 31).

The two fields on the Recurring Invoice Selection Parameters panel: Process All As Approved and Process All As Unapproved (Figure 30) work together with the auto approval field on the Recurring Invoice panel (Figure 32). The results of different field settings are in Table 1.


You can approve or reject invoices from a link on an email message. Connect ERP can send an email to invoice approvers that only requires clicking the approval or rejection link. Approvers can also add comments before sending the email back to the application. The invoice is then approved or rejected, as specified in the email.
Note: Email approval/rejection is also available for requisitions and check requests.
Here are the setup steps:
When a departmental user creates an invoice that must be approved, ERP marks the invoice as Pending Approval (Figure 33) and sends an email message to the designated approver (Figure 34).

The email message for the approver (Figure 34) contains the Invoice No, invoice date, and the Invoice Due Date. Also, it lists the invoice description, organization, vendor, total amount, associated PO number (if relevant) and the distribution lines.


You can review the invoice on the Invoices List, with the approval Status as you specified in the email. In this example, the Status is Approved (Figure 36). (For invoices rejected via email. there will be no Reason Code.)

On the email message, you can also click the link “Click here to view Invoice No XXX” to open ERP and look at the invoice in detail, to accept or reject it (Figure 34). If you are not logged in to the application, clicking the link opens the ERP Sign On panel and you can sign in. The system displays the transaction needing approval. The application remains open for other work.
When you open ERP from the "Click here..." link on an approval email, you can access the entire ERP features menu directly from the approval queue. Here is an example for an invoice approver:


When you receive an email for distribution review of an invoice, you cannot reject or approve from the eMail. You need to login in to the system to look at the invoice.
- Click the link in the email to open and review the invoice on the application. Figure 39 is an example.
Note: Your User Profile must be set up for email review of invoices. See the online documentation for instructions.

The Approval History panel displays information about the approval routing and approval status for your invoice. You can identify approvers, and if several, note which approver currently has your invoice in his/her queue. You can also see the length of time that each approver has/had the invoice and other information.
The topic Approval Information on Inquiry Panels: Examples contains some sample Approval History panels. Approval History is only available from invoice Inquiry.
Figure 40 is a simple example of an invoice's approval history. (See "Approval Information on Inquiry Panels: Examples" for more detailed examples.)

In the Approval History panel for the invoice in Figure 40,
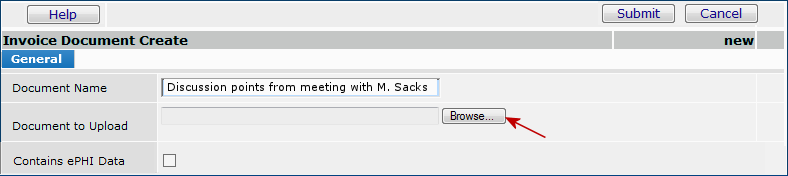
The Invoice Documents panel for an invoice (Figure 40) is available when you edit or inquire on the invoice. From the Invoice Documents panel, you can add documents to the invoice, view the documents, and delete the documents. If you have scanned in paper documents for the invoice and processed the scans, they also appear on the Invoice Documents panel.
On the Invoice Documents panel (Figure 40), if you do not have ePHI access, and the "Contains ePHI Data" checkbox is selected, you cannot view a document. When you click the arrow to open the document, the Insufficient Authority message appears. For more information, see Securing Electronic Protected Health Information (ePHI).
For Bill Only documents, if the checkbox has previously been selected for "Contains ePHI Data," then only the Administrator can change the status of the document and select or unselect the "Contains ePHI Data," checkbox. This checkbox remains locked for everyone else.

Notes:
Copyright © 2023 by Premier Inc. All rights reserved.